🔙 Back to Home

Add GA4 to Jekyll Once, Then Verify Three Layers

A GitHub Pages site may contain many generated HTML pages, but the GA4 tag should have one source of truth. On this Jekyll site, I put it in _includes/head-custom.html, which _layouts/default.html loads once for every generated page.

The installation is complete only when three facts agree: the tag exists in the built HTML, the browser sends the request, and the intended property receives the event.

Create a web data stream and keep its Measurement ID

In Google Analytics:

  1. Create or select an Analytics account.
  2. Create a GA4 property.
  3. Add the website URL as a Web data stream.
  4. Copy the Measurement ID in the form G-XXXXXXXXXX.

The Measurement ID connects browser events from the site to the correct GA4 data stream.

The ID is public configuration and will appear in page source. It identifies the destination property; it is not an API secret. Secrets do not belong in a public GitHub Pages repository.

Put the Google tag in the shared Jekyll head

The original gtag.js snippet is:

<!-- Google tag (gtag.js) -->
<script async src="https://www.googletagmanager.com/gtag/js?id=G-XXXXXXXXXX"></script>
<script>
  window.dataLayer = window.dataLayer || [];
  function gtag(){dataLayer.push(arguments);}
  gtag('js', new Date());

  gtag('config', 'G-XXXXXXXXXX');
</script>

Replace both occurrences of G-XXXXXXXXXX with the Measurement ID. This site stores the snippet in _includes/head-custom.html, which is included once by _layouts/default.html.

Putting the snippet in each Markdown article would duplicate configuration and make future changes harder. The shared include also makes it possible to check one source file while Jekyll distributes the tag to every generated page.

This setup uses gtag.js directly; it does not require Google Tag Manager.

Verify the source, the browser, and GA4

After building and deploying, check three layers:

  1. Generated HTML: open page source and confirm that the Measurement ID appears once inside the page <head>.
  2. Browser request: open Developer Tools and look for a request to google-analytics.com/g/collect or analytics.google.com/g/collect. A successful transmission normally returns 200, while an ad blocker may prevent the request entirely.
  3. GA4 Realtime or DebugView: visit the site and confirm that the expected event reaches the intended property. DebugView is more useful when event parameters must be inspected.

If Realtime remains empty, first check the Measurement ID, duplicate or missing tags, deployment status, browser blocking, consent state, and JavaScript errors. Realtime and DebugView are immediate verification tools; standard reports can take longer to process. There is little value in interpreting reports until this collection path works.

The first reports confirm more than installation

The Home report below shows active users, new users, event count, and the Realtime panel. It confirms that GA4 is receiving events, but the small early sample should not be treated as a stable traffic pattern.
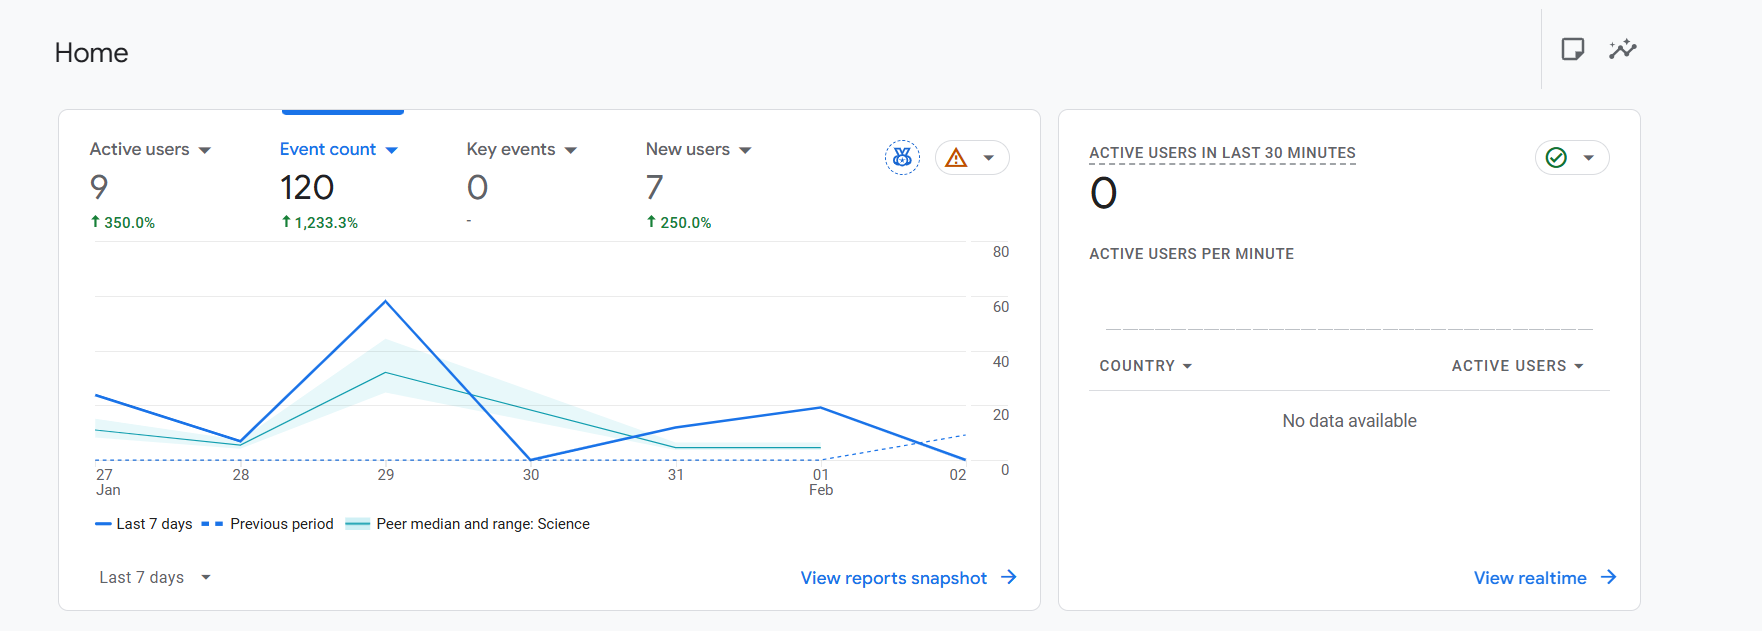
GA4 Home report with active users and event count

The next card group breaks the same traffic into country, page title, and session acquisition channel:
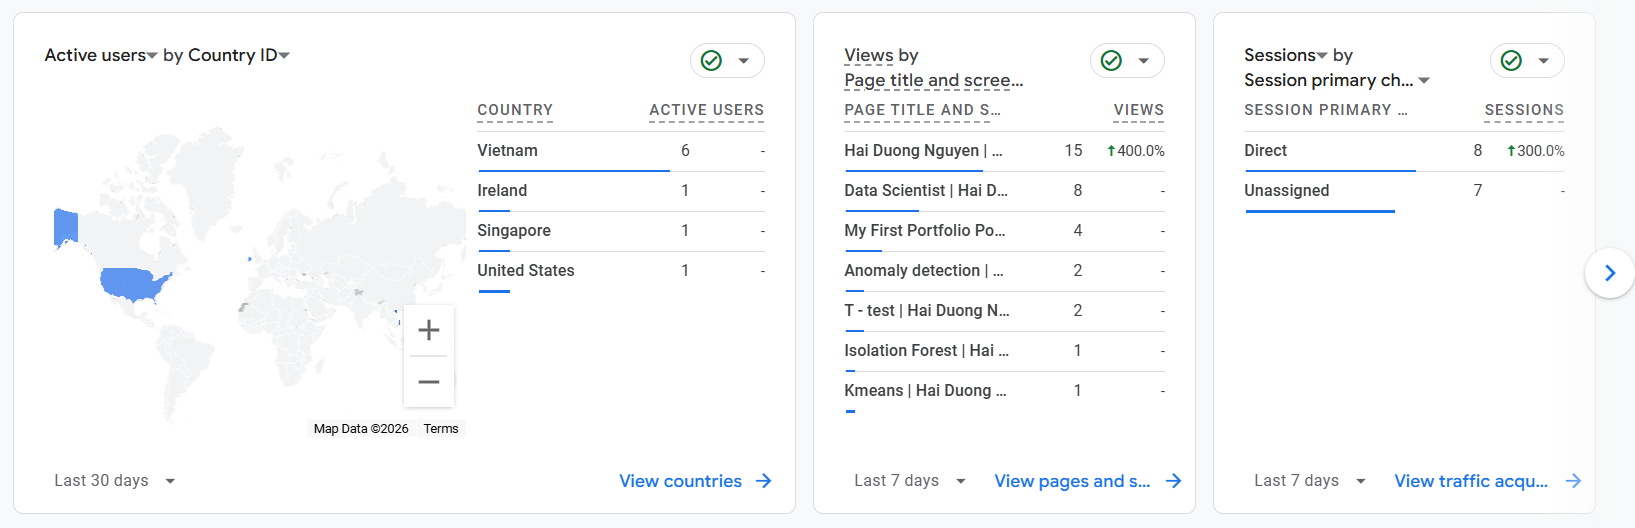
GA4 cards for country, page views, and acquisition channel

GA4 also organizes built-in reports around business objectives, user attributes, and technology:
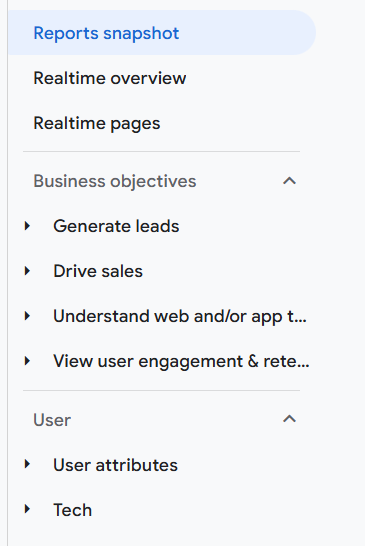
GA4 built-in report navigation

These reports become useful only after their underlying events and dimensions match the questions being asked. Custom events and reports should come after the default collection has been verified and understood.

Installation success is not measurement success

The shared tag confirms that pages can send standard events. It does not yet measure every behavior that matters on this blog. The EN/VI switch changes content without navigation, so it needs an explicit event if language choice is a reporting question. The link to the banking lab also needs a defined event if that navigation is a site objective.

Before adding either event, define its stable name, parameters, trigger, and report. This prevents collecting clicks that have no decision attached to them.

The current implementation has a privacy decision to make

The tag in _includes/head-custom.html currently loads immediately. Language preference stored by the site and analytics storage serve different purposes. If the deployment requires user consent for analytics storage, consent behavior must be implemented and tested as part of the collection path; the tag snippet alone does not make that decision.

The useful stopping condition is therefore stricter than “the tag exists”: one copy in generated HTML, one successful browser collection request, the expected event and parameters in Realtime or DebugView, and a documented decision about what the site should collect.

Reference: Google Analytics — verify and troubleshoot setup and Google Analytics — set up events.

🔙 Quay lại trang chủ

Thêm GA4 vào Jekyll một lần, sau đó kiểm tra ba lớp

Một website GitHub Pages có thể có nhiều HTML page được generate, nhưng GA4 tag chỉ nên có một source of truth. Trên Jekyll site này, tôi đặt tag trong _includes/head-custom.html; _layouts/default.html load file đó một lần cho mọi page được tạo.

Installation chỉ hoàn thành khi ba dữ kiện cùng khớp: tag có trong built HTML, browser gửi request và đúng property nhận được event.

Tạo web data stream và lưu Measurement ID

Trong Google Analytics:

  1. Tạo hoặc chọn một Analytics account.
  2. Tạo GA4 property.
  3. Thêm URL của website dưới dạng Web data stream.
  4. Copy Measurement ID có dạng G-XXXXXXXXXX.

Measurement ID kết nối browser event từ website với đúng GA4 data stream.

ID là public configuration và xuất hiện trong page source. Nó xác định destination property, không phải API secret. Secret không được đặt trong public GitHub Pages repository.

Đặt Google tag trong shared Jekyll head

Snippet gtag.js gốc là:

<!-- Google tag (gtag.js) -->
<script async src="https://www.googletagmanager.com/gtag/js?id=G-XXXXXXXXXX"></script>
<script>
  window.dataLayer = window.dataLayer || [];
  function gtag(){dataLayer.push(arguments);}
  gtag('js', new Date());

  gtag('config', 'G-XXXXXXXXXX');
</script>

Thay cả hai vị trí G-XXXXXXXXXX bằng Measurement ID. Website này lưu snippet trong _includes/head-custom.html, và _layouts/default.html include file đó đúng một lần.

Nếu đặt snippet trong từng bài Markdown, cấu hình sẽ bị lặp và khó thay đổi về sau. Shared include cũng giúp chỉ cần kiểm tra một source file trong khi Jekyll phân phối tag đến mọi generated page.

Setup này sử dụng trực tiếp gtag.js; không yêu cầu Google Tag Manager.

Kiểm tra source, browser và GA4

Sau khi build và deploy, kiểm tra ba lớp:

  1. Generated HTML: mở page source và xác nhận Measurement ID xuất hiện đúng một lần bên trong page <head>.
  2. Browser request: mở Developer Tools và tìm request đến google-analytics.com/g/collect hoặc analytics.google.com/g/collect. Một lần truyền thành công thường trả 200, còn ad blocker có thể chặn hoàn toàn request.
  3. GA4 Realtime hoặc DebugView: truy cập website và xác nhận expected event đến đúng property. DebugView hữu ích hơn khi cần kiểm tra event parameter.

Nếu Realtime vẫn trống, trước tiên hãy kiểm tra Measurement ID, tag bị lặp hoặc thiếu, deployment status, browser blocking, consent state và JavaScript error. Realtime và DebugView là công cụ kiểm tra tức thời; standard report có thể cần thêm thời gian xử lý. Chưa nên diễn giải report khi collection path này chưa hoạt động.

Những report đầu tiên xác nhận nhiều hơn việc cài đặt

Home report dưới đây hiển thị active user, new user, event count và Realtime panel. Nó xác nhận GA4 đang nhận event, nhưng sample nhỏ ban đầu chưa thể được xem là một traffic pattern ổn định.

GA4 Home report với active user và event count

Nhóm card tiếp theo phân tách cùng lượng traffic theo country, page title và session acquisition channel:

GA4 card về country, page view và acquisition channel

GA4 cũng tổ chức built-in report theo business objective, user attribute và technology:

Điều hướng built-in report trong GA4

Các report này chỉ hữu ích khi event và dimension bên dưới phù hợp với câu hỏi cần trả lời. Chỉ nên tạo custom event và report sau khi default collection đã được kiểm tra và hiểu rõ.

Cài đặt thành công chưa có nghĩa measurement thành công

Shared tag xác nhận page có thể gửi standard event. Nó chưa đo mọi behavior quan trọng trên blog. Nút EN/VI thay đổi nội dung mà không navigation nên cần event riêng nếu language choice là câu hỏi cần báo cáo. Link sang banking lab cũng cần event được định nghĩa nếu navigation đó là một site objective.

Trước khi thêm event, cần xác định stable name, parameter, trigger và report của nó. Quy tắc này tránh thu thập click không gắn với một quyết định nào.

Implementation hiện tại còn một quyết định về privacy

Tag trong _includes/head-custom.html hiện load ngay lập tức. Language preference do website lưu và analytics storage phục vụ hai mục đích khác nhau. Nếu deployment yêu cầu user consent cho analytics storage, consent behavior phải được triển khai và test như một phần của collection path; tag snippet không tự đưa ra quyết định đó.

Stopping condition hữu ích vì thế chặt hơn “tag đã tồn tại”: một bản tag trong generated HTML, một browser collection request thành công, expected event và parameter trong Realtime hoặc DebugView, cùng một quyết định được ghi lại về dữ liệu website nên thu thập.

Tham khảo: Google Analytics — kiểm tra và xử lý lỗi setup và Google Analytics — thiết lập event.